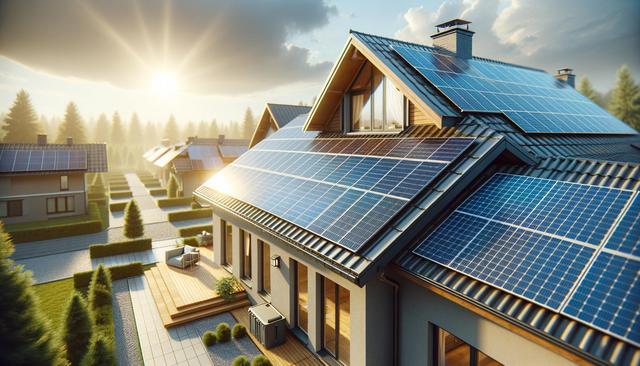
Understanding Solar Roof Technology
Before diving into the installation process, it’s essential to understand what a solar roof entails. Unlike traditional solar panels mounted on top of existing shingles, solar roofs integrate photovoltaic cells directly into roofing materials. This allows them to function both as a protective roof covering and a renewable energy source. These systems are designed to capture sunlight and convert it into electricity, which can be used to power your home or even stored for later use with battery systems.
Solar roofs are typically made of durable materials like tempered glass and can be designed to mimic the appearance of traditional roofing. They are especially appealing to homeowners looking for an aesthetic and functional solution. There are several types of solar shingles available, including:
- Crystalline silicon solar shingles
- Thin-film solar shingles
- Building-integrated photovoltaics (BIPV)
Understanding these options helps you make informed decisions based on your home’s structure, local climate, and energy needs.
Evaluating Your Home’s Suitability
Not every home is immediately ready for a solar roof installation. The first step is to assess the suitability of your roof. Key factors include the roof’s age, condition, orientation, and slope. Ideally, roofs facing south with minimal shading are most efficient for solar energy systems. Additionally, your local climate and average sun exposure are crucial elements in determining the potential energy output.
Conducting a professional solar assessment can help identify any structural issues or barriers. During this evaluation, inspectors usually check:
- Roof size and surface area
- Shading from trees or neighboring buildings
- Roof material and structural integrity
- Local building codes and zoning regulations
If your roof is older or in poor condition, it may be necessary to replace it before proceeding with solar installation. This ensures the longevity and reliability of your solar system.
Planning and Permitting
Once your home is deemed suitable, the planning and permitting phase begins. This is a critical step that involves coordinating with local authorities and utility companies. Depending on your location, you may need to obtain building permits, electrical permits, and approval from homeowner associations. These requirements can vary widely, so it’s important to check with local government offices or work with a solar contractor familiar with regional regulations.
This phase also includes the design of your solar system. Key considerations include:
- Calculating your household’s average energy consumption
- Designing the layout of solar shingles to maximize exposure
- Integrating the system with home energy management tools
- Planning for battery storage if desired
Proper planning ensures that the installation process goes smoothly and complies with all legal and technical standards.
Installation Process
The installation of a solar roof typically takes several days to a few weeks, depending on the system’s complexity and weather conditions. The process begins with the removal of old roofing materials if necessary, followed by the installation of waterproofing layers and mounting hardware. After that, solar shingles or tiles are carefully placed and connected.
During installation, certified electricians will handle the wiring needed to connect your system to the home’s electrical panel and, if applicable, to a battery storage unit. Key steps in the installation process include:
- Safety inspections and site preparation
- Installation of underlayment and flashing
- Mounting and wiring of solar components
- System testing and grid connection
It’s important to ensure that all work is conducted by qualified professionals to meet safety standards and manufacturer guidelines.
Post-Installation and Maintenance
After installation, your solar roof will need to pass a final inspection before it can be connected to the power grid. Utility companies often require a net metering agreement, which allows you to earn credits for excess energy sent back to the grid. Once operational, your system should begin generating electricity immediately, helping to reduce your monthly utility bills.
Maintenance for solar roofs is relatively minimal. Most systems are designed to be self-cleaning, but occasional checks can help ensure optimal performance. Routine maintenance tasks may include:
- Clearing debris or snow from the roof surface
- Inspecting the system for visible damage
- Monitoring energy output via a digital interface
- Scheduling professional inspections every few years
Keeping your solar roof in top condition helps maximize its lifespan and return on investment over time.
Conclusion: Making the Move to Solar
Installing a solar roof offers a long-term, sustainable solution for homeowners looking to cut energy costs and reduce their carbon footprint. From evaluating your home’s readiness to finalizing permits and carrying out the installation, each phase plays a vital role in ensuring success. With careful planning and professional support, a solar roof can be a valuable addition to your property that pays dividends for decades.