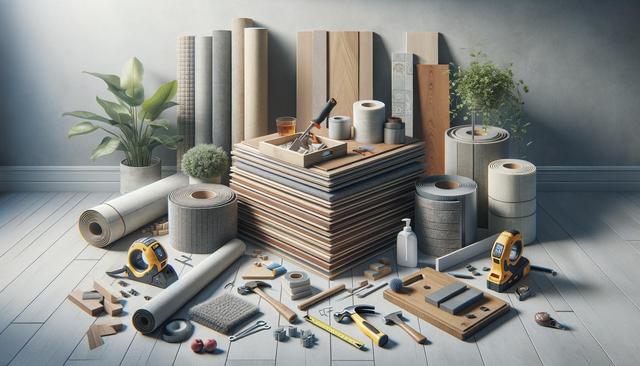
Choosing the Right Flooring Material
The first step in any flooring installation project is selecting the appropriate material for your space. There are many options available, each with its own advantages depending on the room’s function, foot traffic, and overall aesthetic. Common flooring materials include hardwood, laminate, vinyl, tile, and carpet. For example, hardwood offers a timeless appeal and long lifespan, making it suitable for living rooms and bedrooms. On the other hand, vinyl and tile are more water-resistant, ideal for kitchens and bathrooms. Consider the following factors when choosing your material:
- Durability and resistance to wear
- Ease of maintenance and cleaning
- Cost and installation expenses
- Compatibility with underfloor heating systems
Matching the flooring to your lifestyle is essential. Households with pets or children may benefit from more durable and scratch-resistant surfaces. It’s also worth exploring eco-friendly options made from sustainable materials, which have become increasingly popular for environmentally conscious homeowners.
Preparing Your Space for Installation
Before the flooring can be laid, it’s crucial to prepare the area properly. This stage ensures the longevity and performance of the new floor. Begin by removing old flooring materials, cleaning the subfloor, and repairing any damage. A clean, level surface is essential to prevent issues like uneven boards or tiles. Depending on the flooring type, additional preparations like moisture barriers or underlayment may be required. For instance, laminate and engineered wood often need foam underlayment to improve insulation and sound absorption.
Here are a few pre-installation steps to consider:
- Check for moisture issues, especially in basements or bathrooms
- Measure the room accurately to reduce waste and ensure consistent coverage
- Allow the new flooring material to acclimate to the room’s temperature and humidity
- Ensure there’s adequate ventilation during installation
Proper preparation not only improves the final result but also minimizes delays or unexpected problems during the installation process.
DIY vs. Professional Installation
Deciding between doing it yourself or hiring a professional installer largely depends on your experience, budget, and the complexity of the project. DIY flooring installation can save money, especially with click-lock laminate or floating vinyl planks, which are designed for easier handling. However, certain materials like tile or hardwood may require specialized tools and techniques that are best handled by professionals.
Pros of DIY installation include:
- Cost savings on labor
- Control over scheduling and pace
- Satisfaction of completing the project yourself
On the other hand, professional installers bring expertise, efficiency, and access to better tools. They can often complete the job faster and with fewer errors, which is crucial for large or complex areas. Weighing these factors will help you make an informed decision that suits your needs and resources.
Installation Process and Techniques
The installation process differs depending on the flooring type. For example, laminate and vinyl planks often use a floating method, where the boards lock together without nails or glue. Hardwood floors may be nailed, stapled, or glued, requiring more precision and specialized equipment. Tile installation involves laying mortar, placing the tiles with spacers, and applying grout once the adhesive has set.
Here’s a general overview of the installation steps:
- Layout planning to minimize waste and achieve a balanced look
- Cutting pieces to fit edges and obstacles like door frames or vents
- Securing the flooring according to manufacturer guidelines
- Finishing touches like baseboards and transition strips
Throughout the process, attention to detail is key. Gaps, uneven surfaces, or sloppy cuts can detract from the appearance and durability of the floor. Taking your time and following instructions carefully can lead to a more polished final result.
Post-Installation Care and Maintenance
Once your new floors are installed, proper care is essential to preserve their appearance and functionality. Each flooring type has different cleaning and maintenance needs. For instance, hardwood requires regular sweeping and occasional refinishing, while vinyl and tile can be cleaned with a damp mop and mild detergent. Avoid using harsh chemicals or excessive water, as this can damage many flooring surfaces.
Here are a few maintenance tips to keep in mind:
- Use rugs or mats at entry points to reduce dirt and moisture
- Place felt pads under furniture to prevent scratching
- Clean up spills promptly to prevent staining or warping
- Follow manufacturer-specific guidelines for cleaning and upkeep
Keeping your floors in good condition not only extends their lifespan but also maintains the overall aesthetic of your home. Periodic inspections and timely repairs can address minor issues before they become major problems.
Conclusion
Flooring installation is a significant home improvement project that can greatly enhance your space’s comfort and visual appeal. Whether you’re updating a single room or renovating your entire home, taking the time to choose the right material, prepare carefully, and maintain your new surfaces will ensure long-term satisfaction. With thoughtful planning and attention to detail, your flooring investment can deliver both practical benefits and lasting beauty.